How to register and use the Laravel service providers
If you’ve ever been familiar with the Laravel framework, it’s unlikely that you haven’t heard of service containers and service providers. In fact, they are the backbone of the Laravel framework and do all the heavy lifting when you launch an instance of any Laravel application.
In this article, we’ll see what a service container is, and after that, we’ll discuss service providers in detail. In the course of this article, I’ll also demonstrate how to create your own custom service provider in Laravel. When you create a service provider, you also need to register it with your Laravel application in order to use it, so we’ll cover that as well.
There are two important methods: boot and register, that your service provider can implement, and we’ll discuss them in detail in the last section of this article.
Before moving on to the discussion of the service provider, I will try to introduce the service container as it will be heavily used in your service provider implementation.
Understanding Service Containers and Service Providers
What is a service container?
In the simplest terms, we can say that a container in Laravel is a box that contains the bindings of various components, and these are maintained as needed throughout the application.
According to the official Laravel documentation:
The Laravel service container is a powerful tool for managing class dependencies and performing dependency injection.
This way, whenever you need to inline any bean or service, you can specify it in your constructor or method and it will be automatically inlined from the service container as it contains everything you need! Isn’t that cool? This saves you the hassle of manually laying out components and thus avoids hard coupling in your code.
Let’s look at a quick example to understand this.
Class SomeClass
{
    public function __construct(FooBar $foobarObject)
    {
        // use $foobarObject object
    }
}
As you can see, SomeClassneeds an instance FooBarto instantiate. So basically, it has a dependency that needs to be built in. Laravel does this automatically by looking at the container and injecting the appropriate dependency.
And if you’re wondering how Laravel knows which components or services to include in a container, the answer is a service provider. The service provider tells Laravel to include various components in the service container. In fact, this is called binding to service containers, and you need to do it through the service provider.
Thus, the service provider registers all of the container’s bindings, and this is done through the register method of the service provider’s implementation.
Another question that should immediately pop up is: how does Laravel know about the different service providers? Did you just say something? I just heard someone say that Laravel should figure this out automatically too! Oh, you’re asking too much: Laravel is a framework, not a superhuman, is it? So service providers are what you need to tell Laravel directly.
Go ahead and see the contents of the file config/app.php. You will find an array entry that lists all the service providers that will be loaded during the initial load of the Laravel application.
'providers' => [
    /*
     * Laravel Framework Service Providers...
     */
    Illuminate\Auth\AuthServiceProvider::class,
    Illuminate\Broadcasting\BroadcastServiceProvider::class,
    Illuminate\Bus\BusServiceProvider::class,
    /*...*/
    Illuminate\Translation\TranslationServiceProvider::class,
    Illuminate\Validation\ValidationServiceProvider::class,
    Illuminate\View\ViewServiceProvider::class,

    /*
     * Package Service Providers...
     */

    /*
     * Application Service Providers...
     */
    App\Providers\AppServiceProvider::class,
    App\Providers\AuthServiceProvider::class,
    // App\Providers\BroadcastServiceProvider::class,
    App\Providers\EventServiceProvider::class,
    App\Providers\RouteServiceProvider::class,
],
So, this was the container at your disposal. In the next section, we’ll focus on the service provider, which is the main topic of this article!
What is a service provider?
If the container is what allows you to define bindings and install dependencies, a service provider is where it all happens.
Let’s take a quick look at one of the major service providers to see what it does. Open filevender/laravel/framework/src/Illuminate/Cache/CacheServiceProvider.php
public function register()
{
    $this->app->singleton('cache', function ($app) {
        return new CacheManager($app);
    });

    $this->app->singleton('cache.store', function ($app) {
        return $app['cache']->driver();
    });

    $this->app->singleton('memcached.connector', function () {
        return new MemcachedConnector;
    });
}
The important thing to note here is the method register that allows you to define container bindings. As you can see, there are three bindings for the cache, cache.store and memcached.connector.
Basically, we inform Laravel that whenever there is a need to allow a service to be retrieved cache, it should return an instance of CacheManager. So we just add this match to the container, which can be accessed via $this->app.
This is the correct way to add any service to a Laravel container. It also allows you to understand how Laravel goes through the register method of all service providers and populates the container! As we mentioned earlier, it uses the list of service providers from the config/app.php.
And it was a story about a service provider. In the next section, we’ll discuss how to create a custom service provider so that you can register your custom services with a Laravel container.
Creating your own service provider
Laravel already has a handy command line utility, artisan, that allows you to generate template code so you don’t have to create it from scratch. Go to the command line and run the following command at the root of the application to create a custom service provider.
php artisan make:provider DemoCustomServiceProvider
// Provider created successfully.
And this command should create a file DemoCustomServiceProvider.php in the app/Providers. When we open the file, we will see the following code
<?php
namespace App\Providers;

use Illuminate\Support\ServiceProvider;

class DemoCustomServiceProvider extends ServiceProvider
{
    /**
     * Bootstrap the application services.
     *
     * @return void
     */
    public function boot()
    {
        //
    }

    /**
     * Register the application services.
     *
     * @return void
     */
    public function register()
    {
        //
    }
}
As we discussed earlier, there are two methods, register and booy, that you will deal with most of the time when working with your custom service provider.
The method register is where you define all custom container bindings. On the other hand, a method boot is a place where you can use services already registered via the register method. In the last section of this article, we will discuss these two methods in detail as we go through some practical examples to understand the use of both methods.
Register your custom service provider
Thus, you have created your own service provider. Wonderful! You then need to tell Laravel about your custom service provider so that it can load it along with other providers during bootstrap.
To register a service provider, you simply need to add an entry to the service provider array in the config/app.php.
'providers' => [
    /*
     * Laravel Framework Service Providers...
     */
    Illuminate\Auth\AuthServiceProvider::class,
    Illuminate\Broadcasting\BroadcastServiceProvider::class,
    Illuminate\Bus\BusServiceProvider::class,
    /*...*/
    Illuminate\Translation\TranslationServiceProvider::class,
    Illuminate\Validation\ValidationServiceProvider::class,
    Illuminate\View\ViewServiceProvider::class,

    /*
     * Package Service Providers...
     */

    /*
     * Application Service Providers...
     */
    App\Providers\AppServiceProvider::class,
    App\Providers\AuthServiceProvider::class,
    // App\Providers\BroadcastServiceProvider::class,
    App\Providers\EventServiceProvider::class,
    App\Providers\RouteServiceProvider::class,
    App\Providers\DemoCustomServiceProvider::class, // <- Insert class here
],
That’s all! You have registered your service provider with the Laravel Schema! But the service provider we created is almost an empty template and is not used at the moment. In the next section, we’ll look at some practical examples to see what you can do with the register and boot methods.
Let's go through the register and boot methods
First, we’ll take a look at the method register to understand how you can use it. Open the service provider file you created earlier app/Providers/DemoCustomServiceProvider.php and replace the existing code with the following.
<?php
namespace App\Providers;

use Illuminate\Support\ServiceProvider;
use App\Library\Services\DemoOne;

class DemoCustomServiceProvider extends ServiceProvider
{
    public function boot() {/*...*/}

    public function register()
    {
        $this->app->bind('App\Library\Services\DemoOne', function ($app) {
          return new DemoOne();
        });
    }
}
There are two important points here:
- We have imported
App\Library\Services\DemoOneso that we can use it. The classDemoOnehasn’t been created yet, but we’ll do that in a moment. - In the register method, we used the
bindservice container method to add our service binding to the container. Thus, whenever a dependency needs to be resolvedApp\Library\Services\DemoOne, it invokes a closure that instantiates and returns aApp\Library\Services\DemoOne.
To do this, you just need to create a app/Library/Services/DemoOne.php.
<?php
namespace App\Library\Services;

class DemoOne
{
    public function doSomethingUseful()
    {
      return 'Output from DemoOne';
    }
}
And here is the code somewhere in your controller where the dependency will be injected.
<?php
namespace App\Http\Controllers;

use App\Http\Controllers\Controller;
use App\Library\Services\DemoOne;

class TestController extends Controller
{
    public function index(DemoOne $customServiceInstance)
    {
        echo $customServiceInstance->doSomethingUseful();
    }
}
This is a very simple class binding example. In fact, in the above example, there is no need to create a service provider and implement the register method as we did, since Laravel can automatically resolve it using reflection.
A very important note from the Laravel documentation:
There is no need to bind classes into the container if they do not depend on any interfaces. The container does not need to be instructed on how to build these objects, since it can automatically resolve these objects using reflection.
On the other hand, it would be very helpful if you would bind an interface to a specific implementation. Let’s take an example to understand this.
Let’s create a very simple interface in app/Library/Services/Contracts/CustomServiceInterface.php.
<?php
namespace App\Library\Services\Contracts;

Interface CustomServiceInterface
{
    public function doSomethingUseful();
}
Next, let’s create two implementations of this interface. Basically, we just need to create two classes that implement the CustomServiceInterface.
Create a class DemoOne in app/Library/Services/DemoOne.php.
<?php
namespace App\Library\Services;

use App\Library\Services\Contracts\CustomServiceInterface;

class DemoOne implements CustomServiceInterface
{
    public function doSomethingUseful()
    {
      return 'Output from DemoOne';
    }
}
Likewise, DemoTwo will be in App/Library/Services/DemoTwo.php.
<?php
namespace App\Library\Services;

use App\Library\Services\Contracts\CustomServiceInterface;

class DemoTwo implements CustomServiceInterface
{
    public function doSomethingUseful()
    {
      return 'Output from DemoTwo';
    }
}
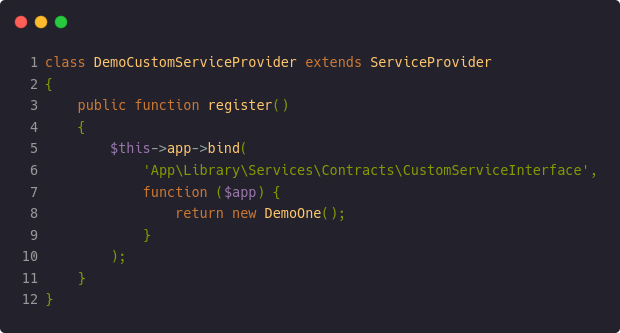
Now, instead of binding a class, we will bind an interface. Open again DemoCustomServiceProvider.php and modify the code as shown below.
<?php
namespace App\Providers;

use Illuminate\Support\ServiceProvider;
use App\Library\Services\DemoOne;

class DemoCustomServiceProvider extends ServiceProvider
{
    public function boot()
    {
    }

    public function register()
    {
        $this->app->bind(
            'App\Library\Services\Contracts\CustomServiceInterface',
            function ($app) {
                return new DemoOne();
            }
        );
    }
}
In this case, we have bound the interface App\Library\Services\Contracts\CustomServiceInterface to the implementation DemoOne. Therefore, whenever a dependency needs to be resolved App\Library\Services\Contracts\CustomServiceInterface, an instance will be created and an object will be returned App\Library\Services\DemoOne. Now that makes sense, doesn’t it?
Let’s quickly review the controller code.
<?php
namespace App\Http\Controllers;

use App\Http\Controllers\Controller;
use App\Library\Services\Contracts\CustomServiceInterface;

class TestController extends Controller
{
    public function index(CustomServiceInterface $customServiceInstance)
    {
        echo $customServiceInstance->doSomethingUseful();
    }
}
As you may have guessed, $customServiceInstance must be an instance of App\Library\Services\DemoOne! The beauty of this approach is that you can easily replace the implementation DemoOne with another class.
Let’s say you want to use an implementation DemoTwo instead of DemoOne. In this case, you just need to make the following changes to the service provider DemoCustomServiceProvider.php.
Now let’s make small changes to the code
// Find the following line:
use App\Library\Services\DemoOne;
// And replace it with:
use App\Library\Services\DemoTwo;

// Find this in a similar way:
return new DemoOne();
// This should be replaced with:
return new DemoTwo();
The same approach can be used if you want to replace any core implementation with your own. And it’s not just the bind method that you could use to bind a service to a container; The Laravel container provides various binding methods. Please see the official Laravel documentation for a complete reference.
The next candidate is a method boot that can be used to extend the functionality of Laravel’s core. In this method, you can access all services that have been registered using the register method on service providers. In most cases, you want to register event listeners on this method that will fire when something happens.
Let’s look at a few examples that require the implementation of the boot method.
You want to add your own form field validation tool to Laravel.
public function boot()
{
    Validator::extend('my_custom_validator', function ($attribute, $value, $parameters, $validator) {
        // validation logic goes here...
    });
}
If you want to register a display builder, this is the perfect place to do it! In fact, you could say that the boot method is often used to add display builders!
public function boot()
{
    View::composer(
        'demo', 'App\Http\ViewComposers\DemoComposer'
    );
}
Of course, you need to first import the facade Illuminate\Support\Facades\View in your service provider.
In the same territory, you can share data across multiple views!
public function boot()
{
    View::share('key', 'value');
}
It can also be used to define explicit model bindings.
public function boot()
{
    parent::boot();

    Route::model('user', App\User::class);
}
These were a few examples to demonstrate the use of the boot method. The more you dive into Laravel, the more reasons you will find to implement it!